How To Build a Freestanding Bookcase
Continued from page 1
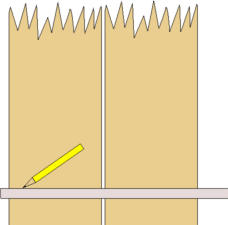
Align the bottom edge of the two boards. The bottom shelf will be 4" up from the bottom. However, that is the top of the shelf, which is .75" thick. So we want to measure 3.25" up from the bottom, to mark the position for the top of the cleat. Do the same on the far edge on the other side piece. Now align a straight edge on the marks and draw a line all the way across the two boards. Now measure from the center of the line down to the bottom edge of the two boards. If it is anything other than 3.25",
the bottom edge is not square to the side and will result in the shelves
being out of level from front to back.
The remaining shelves should be measured and marked off in the same way. Always measure from the bottom, not from the last line drawn. Measuring from the bottom for each shelf is more accurate. Our finished shelf height is 48", the bottom shelf is 4" up, so we have 44" from the top of the bottom shelf to the top of the unit. This gives us 11" for each shelf, measuring from shelf top to shelf top. The mark for each cleat will be 11" higher than the previous cleat. The second shelf marks should be made at 14.25" (11" + 3.25 " ) up from the bottom. The remaining cleat marks should made at 25.25"and 36.25".
For the assembly to go smoothly, it is necessary for the sides and the shelves to be all the same width. However, individual boards can vary in width and so it may be necessary to resize them to a consistent width. Determine the narrowest width and use that as the standard for all of the other boards. Removing a small amount from the length of a board can be tricky, and there are a few different ways to do it. Using a circular saw, you can attach a straight edge as a cutting guide to the board to be cut and then run the shoe of the circular saw along the guide to make a straight cut. Determine the distance from the blade to the edge of the shoe and use that measurement to place the cutting guide offset from your cut line.
Now we are ready to attach the cleats to the sides. We'll use glue and three 3d finish nails. Note which end of the side piece is the bottom. Start three nails into the cleat, so that the sharp tip just barely protrudes from the other side. Hammer one nail 1.5" from each end and one in the middle. Apply a liberal amount of glue to the cleat. Have a wet rag ready to wipe away any glue that squeezes out. Align a cleat under the marking line and nail the cleat in place. Repeat this for each of the cleats. Use a nail set to drive the nail heads below the surface of the wood.
With the cleats in place, we are ready to install the shelves. Start by driving three 5d nails part way through each end of a shelf. Pick the side that you want to face up, start the nails about .75" from the end of the shelf and drive them at a slight angle so that they go solidly into the cleat. Apply glue to the top of the cleat and the end of the shelf. Stand up one side piece and support it so that it will stand upright. Place the bottom shelf onto the cleat and then place the cleat on the other side piece under the other end of the shelf. Nail the shelf in place and wipe away any glue that squeezed out. Use a nail set to drive the nail heads below the surface of the wood. Repeat these steps for each of the remaining shelves, working from the the bottom, up.
The top of the shelf unit sits on top of the side pieces, rather than between them like the shelves. Drive the nails in at angle, just like the shelves, but start them about 1.5" from each end. Apply glue to the cleat and to the top of the end piece.
Now check the unit for square. A good way to check a large piece like this one is to measure the two diagonals of the rectangle. If they are exactly them same size, the unit is square. If the back piece is square, it can be used to square the unit also. Align one corner of the back piece with the top and side of the unit and nail it with one 3d nail. Now align the bottom corner on the same side and nail it. Next, align the other top corner and nail it. Finally, nail the last bottom corner and the unit should aligned and square. As an enhancement to this piece, use beadboard instead of plain plywood.
The face frame is a decorative piece used to cover the mechanics of
the assembly. It also adds weigh to the piece, as well as ornamentation.
The shelves are only .75" thick, but with the addition of a face
frame, they will appear to be 1.5" thick. Depending upon the style
of furniture you want to build, this dimension could be increased or
decreased to change the piece's style.
You could completely build the face frame and then attach it to the bookcase. However, it can be difficult to get every piece precisely aligned. It will be easier to assemble it onto the case. Start by applying glue to the side support, the end of the cleat and the part of the shelf just above the cleat. Align a 1" x 2" board to the side support so that it is flush with the outside face of the support, and nail it in place.
Next, apply glue to the shelf fronts, the cleat ends and the other side support. Align the edge of a 1" x 2" flush with the top of the bottom shelf and nail it in place with four 3d finish nails. Be sure to drive the nails straight in so they do not protrude through the surface of the shelf. Repeat these steps for the face frame piece at the top of the bookcase.
With the top and bottom shelf rails in place, align the other side support face piece and nail it in place, at the top and bottom only. Now you can install the final three shelf face pieces. Once the shelf rails are on, push the side support tightly against the face pieces and finish nailing the side support face piece in place. Use a nail set to drive all the exposed nail heads below the surface of the wood.
The final piece for our bookcase is the base moulding. The base moulding anchors the piece and gives it more of a furniture feel. For the best look, we should miter the corners. However, mitered corners can be a little difficult with a hand saw. To get 45° miters, a miter box should be used or a power miter saw is even better. If you don't want to try to do mitered corners then cut one 1" x 4" to the width of the case plus 1.5" (.75" + .75" for each of side moulding pieces). Next, cut two pieces to butt from the front moulding to the back of the case.
To cut the mitered corners, the front piece will be the width of the unit plus 1.5" for the miters that extend beyond the case. Cut one miter to the left and the other end to the right. This piece needs precision, so it is best to cut it a little long and then trim it down to the precise size. The side pieces are easier to cut. Leave the pieces oversized, cut the miter on one end, align it with the front piece and then mark the cut line to align with the back of the case.
Apply glue to the miters, align the pieces to the case and nail them in place. Use a nail set to drive any exposed nail heads below the surface.
To finish the piece, we first will fill the nail holes with putty. Allow
the putty to dry and then sand the piece with 220 grit sand paper. The
piece can be stained, painted or you can simply apply a clear finish.
If you used pine for this project, it is wise to use a sealer or stain
blocking primer over any knots or obvious sap pockets. This will prevent
sap from leaching out of the wood and marring the surface.
|