How To Install a Rain Barrel
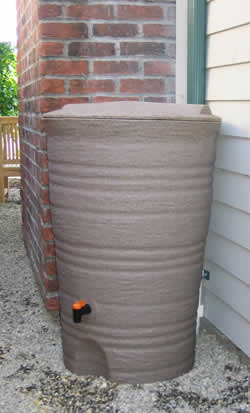
Rain barrels are a great way to collect rain water for use in the warm season. You can conserve water, which is mandatory in some communities, while also saving some money on your water bill. You can buy a purpose-built rain cistern like the one shown here or repurpose a trash can or barrel of your own.
There are a wide variety of storage tanks to choose from. Some designs can be installed into your walls or under the floor, where the thermal mass of the water helps keep your home cooler in the summer and warmer in the winter. While the water may not be fresh enough for drinking as is, with treatment it can also be used as an emergency supply of drinking water.
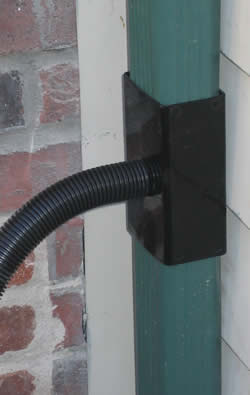
The rain barrel we chose comes with a diverter that can be installed into the downspout in just a few minutes. The water runs down the downspout to the diverter and fills the rain barrel. When the barrel is full, the water bypasses the diverter and continues down the downspout normally. Other systems may require you to manually disconnect the fill hose to prevent overflowing the storage tank.
Installing our model, by Fiskers, took less than half an hour. The first step is to find a suitable location. An ideal location will be near a downspout, preferably one that drains a large area of roof. The barrel must be set up on level ground, so clear away any loose dirt, rock and plants and level the surface. Next, install the diverter. Our instructions guided us to make a cut across the downspout with a hacksaw, about 3/4" below the top lip of the barrel when it is in position. The second cut is about 1.5" below the first. We found it easier to make the first cut most of the way through, making the second cut and then finishing the first cut. This way the downspout did not move around so much while cutting.
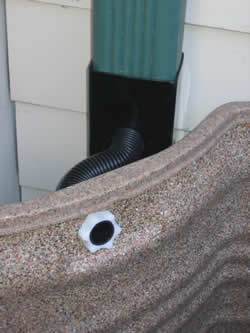
Once we slipped the diverter onto the downspout, it was time to cut the hose to length. It should be cut as short as possible and it is critical that it be level between the downspout and the barrel. If the hose sags, the barrel will not fill properly or possibly not at all.
After connecting the hose, we double-checked that the barrel was level and then put the lid on. The lid should keep insects out, but to reduce the risk of mosquitoes and to inhibit algae growth, we recommend adding a couple tablespoons of chlorine bleach to the water. This small amount of bleach should not harm the plants in your garden, although it should not be used to add water to a fish pond or bird bath.
Most rain water collection systems have a spigot to connect a garden hose. The water is gravity fed, so it won't have the usual pressure, but it should be adequate for getting water to where you need it or at least to fill a watering can. If you are making your own rain barrel, you can use a standard threaded hose bib and screw it through a hole in the barrel into a fitting on the inside to hold it in place. Add some silicone caulk around the opening on the inside of the barrel to prevent leaks.
|