How to Install an Interlocking Stone
Patio
If
you’d like to add a patio to your back yard, using interlocking
stone pavers is an easy and attractive way to do it. Pavers are set on
a dry bed of sand and the project doesn't require any special skills.
Start out by deciding where and how big you want your new
patio to be. Measure the length and width, and multiply the two
numbers together to determine total square footage. Now take a trip
to your local home improvement or landscaping retailer--calculator in
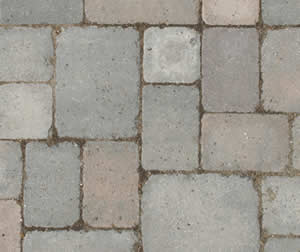
hand--and browse the types of interlocking patio stones that they have
available. There’s
wide variety of colors, shapes and sizes. You can even mix and
match stones to create borders or designs. Put that calculator
to work figuring out how many stone pavers you need to fit
your square footage. Be sure to buy 5 to 10 percent over what you calculate
to allow for cutting and breakage.
 |
Plus, you’ll have pavers that match in case your retailer stops carrying
your particular style!
Next,
clear the area where the pavers will be installed. Ordinarily, installation
should have the surface of the pavers flush with the surrounding ground
or slightly higher. However, a raised bed installation is also possible
by building a perimeter base. One method to create a raised base is to
pour a concrete base slightly recessed into the ground. The area within
the perimeter can then be filled with stone, gravel and sand to the
desired height.
If installing flush with the ground level, use
a shovel to mark out the area to be excavated. Dig the foundation deep
enough to accommodate the thickness of the pavers plus the base material
you will put down (about 1 inch in this case).
The base must also be sloped slightly away from the house to allow
for proper water runoff. The slope should be about one inch for every
four to eight feet. So if your patio extends 10 feet from your
home, a minimum slope of 1.25 inches should be used. Don't worry too
much about digging too deep or about the slope now, you can get it just
right when you add the sand base.
In order to keep a constant depth and slope, place stakes at
the high and low point of the patio. Tie a string to each stake at the
desired finished height. Use a line level to achieve the desired slope.
Then to check the depth, cut a piece a string to twice as long as the
desired depth. Fold the piece of string in half and hang it over the
staked string. Slide the string along the length to check for minimum
depth.
Many pavers are capable bearing the weight of vehicles, but be sure
to check the manufacturer's specifications for the type select. If heavy
loads will be placed upon your pavers, a deeper sub-base will be required
to prevent depressions from forming.
Now,
build a frame around the perimeter of the cleared area using aluminum
edging or treated lumber; install stakes intermittently around the frame
to secure it. A
frame keeps the pavers in place over time, plus provides a barrier to
keep weeds out of the patio area. A frame also provides stronger
overall structure and lends a finished look.
Pour about one inch of sand throughout the entire area. If you take
the time to level your frame in the previous step, you can use them as
a guide for leveling the sand. Cut a 2x6 so that it can ride on the tops
of the frame. Then notch the ends by an amount equal to the thickness
of the pavers. When you set the 2x6 on the frame, it will smooth the
sand to just the right height for the pavers.
The sand should be tamped down to compact it. Additional sand may need
to be added to provide the proper height. Spray
a very fine mist of water over the sand. Allow the water to rain down
gently to avoid moving the sand.
Now
it’s time to lay the stones. Start in a corner and work outward.
Be careful not to scoot the stones sideways in the sand, as you’ll
push away sand and create a low spot. Rather, place them in
straight downward. A rubber mallet is useful for tapping the pavers into
place.
To cut stones, you can use a mason's chisel and a small sledge hammer
or they can be cut with masonry saw or a circular saw fitted with a masonry
blade. Follow the instructions by the tools manufacturer and choose a
blade specifically designed for the type material being cut. Always wear
eye protection.
Once the stones are placed, pour sand over them and sweep it into the
joints. Gently tap the pavers with a mallet to help the sand fill the
voids. Continue adding sand until all the joints are filled. Sweep away
excess sand and lightly wet down the entire area. Do not use cement or
mortar to fill the joints. Sand will lock them pavers in place, but will
allow removal should the need arise.
Now
you have an attractive seating area, which accents your landscaping and
provides a place for entertaining guests! It’s time
to break out the barbecue grill! |